Page 3 - SBP Perth Blog
-
- April 01, 2026
Installing cement sheeting successfully comes down to following a system. The sheet is only one part of the wall, ceiling, or floor build-up, so layout, fixing, jointing, and moisture detailing matter as much as the board itself. Always confirm the manufacturer’s installation guide for your exact product and application.
Step 1: Choose the right sheet for the application
Confirm whether it’s internal lining, wet-area lining, external cladding, ceiling lining, or flooring/tile underlay. This affects thickness, edge type, fasteners, and jointing.
Step 2: Check framing is compliant and straight
Make sure studs/joists are plumb, straight, and at the correct centres for the board. A cement sheet will telegraph framing issues into the finish, especially under paint or tiles.
Step 3: Store and handle sheets correctly
Keep sheets flat, dry, and supported. Lift with two people when needed to prevent cracking from flexing.
Step 4: Plan the layout before fixing
Set out so sheet edges land
-
- March 31, 2026
A cement sheet is a common Australian building term for flat boards made from a cement-based matrix with reinforcing fibres. You will see it used as internal wall and ceiling linings, external cladding, wet-area linings, and as a base for tiles and other finishes.
What is a cement sheet?
A cement sheet is a rigid panel manufactured as a stable, dimensionally consistent building lining. It’s often referred to as fibre cement sheet. Some products are standard fibre cement, while others are compressed fibre cement, which is denser and tougher.
Fibre cement sheets are used widely for walls, ceilings, eaves, and as a lining in wet areas.
Compressed fibre cement sheets are typically chosen when higher impact resistance or higher load capacity is needed, such as certain flooring underlays and high-wear areas.
What is a cement sheet made of?
Most cement sheet products are made from a cementitious binder combined with reinforcing fibres and other additives that help with workability, strength,
-
- March 30, 2026
Cement is a binder used in construction that hardens and adheres to other materials. It’s rarely used on its own—mixed with fine aggregate it becomes mortar. Mixed with sand and gravel, it becomes concrete.
In this article, we’re going to give you a complete fact sheet including everything you need to calculate the amount of cement needed.
The different metric units and why they matter
When people ask “bags of cement per m³” they’re using metric units:
m - metres = length (the length of a wall)
m² - square metres = area (floor area, wall area to be rendered/painted/covered)
m³ - cubic metres = volume (how much concrete you’re pouring)
Where each unit is used in building
m² is used when you’re covering a surface: render areas, slab area, wall area, etc.
m³ is used when you’re ordering or mixing something by volume: concrete for slabs/footings, mortar volumes, sand/aggregate quantities, etc.
How to calculate them
Area (m²) for rectangles:
Area = length × width
Volume (m³) for rectangular
-
- March 28, 2026
People commonly use the term “drying” with regards to cement, when cement-based materials mainly set and gain strength by hydration. The surface can feel dry while the material is still curing internally.
Here, we’ll answer all your related questions.
Drying vs setting vs curing
Drying: moisture leaving the surface. The surface can look or feel dry even if the cement hasn’t gained much strength yet.
Setting: the mix changes from plastic/workable (the mix is still soft and can be placed, spread, compacted, and finished) to rigid/stiff state. This controls your finishing/working window.
Curing: strength development over time. Concrete commonly takes about 28 days to reach near design strength under typical conditions.
Hardening: informal term people use to describe “it’s solid now” (usually after initial set), but it doesn’t mean “fully cured”.
You can find all the cement and concrete you need here.
Quick timeline
Concrete gains strength fastest early on, then slows down. A common
-
- March 27, 2026
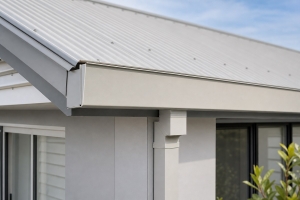
Sisalation is commonly used in Australia to describe a reflective foil roof/wall sarking. Sarking is a pliable building membrane that’s installed under metal roofing or tiles and sometimes behind wall cladding.
It typically combines reflective aluminium foil layers with reinforced substrates so it can act as a radiant barrier and a secondary moisture barrier. It’s the silver foil blanket under the roof sheeting that helps manage heat and moisture.
Where is Sisalation commonly used?
- Under metal roofs such as Colorbond roofing
- Under tiled roofs as an additional membrane layer
- Behind external wall cladding as a wall wrap
- Sheds and workshops to reduce radiant heat and condensation drip.
Benefits of using Sisalation
1) Helps provide better comfort and energy efficiency
The reflective foil surface helps reduce radiant heat transfer, which can improve comfort and reduce cooling/heating load. This is especially true under sun-exposed metal roofing.
-
- March 26, 2026
Spacers, often called bar chairs, are what keep reinforcing mesh at the correct height inside concrete. Without enough spacers, mesh can sag to the bottom of the slab, which reduces concrete strength and can lead to cracking over time.
So, how many spacers do you need?
Here are practical rules used on-site and situations where you should add extra spacers.
Standard spacing: 1 spacer per square metre
A common guideline is:
1 spacer per square metre (m²) of mesh which equals roughly a 1000 mm × 1000 mm grid.
This gives a simple starting point for estimating chairs/spacers for flat slab mesh.
Typical layout: edges need closer support
Edges are where reinforcement can shift more easily during a pour, and where foot traffic and screeding can disturb the mesh.
Typical edge spacing is: 500 mm – 600 mm apart along edges
This helps stop the mesh from dipping or rolling at the slab perimeter.
Where you should add extra spacers
Even if you’re using the 1 per m² rule,
-
- March 25, 2026
Galvanized reinforcing mesh is standard steel reinforcement coated with zinc for improved corrosion resistance. It’s not necessary for every job, but in the right conditions, can significantly extend durability and reduce the risk of rust concrete damage.
Below are the most common situations where galvanized mesh is worth considering.
1) Coastal or marine environments
Salt in the air can accelerate corrosion, especially over time as moisture and chlorides find pathways into the slab.
A practical guide is always within 1 km of the ocean use galvanized mesh
This is especially relevant for exposed external slabs and coastal suburbs where wind carries salt inland.
2) Aggressive soil conditions
Some soil and groundwater conditions are naturally more corrosive to steel reinforcement. These conditions can increase corrosion risk and shorten the service life of standard reinforcement.
Galvanized mesh is commonly considered for:
- Acidic soils
- Sulphate-rich soils
- Areas
-
- March 24, 2026
What is a hoop iron?
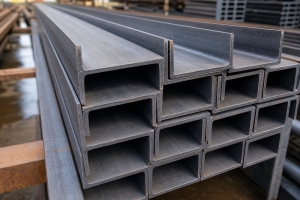
Hoop iron, also known as builders strapping or bracing strap, is a narrow galvanized steel strap used for tying, bracing and fixing in residential and light commercial construction. It is popular because it is strong, flexible, fast to install, and suits tight spaces where rigid braces are not practical.
Hoop iron options commonly include:
- Perforated or punched strap with factory punched nail holes
- Unpunched strap where you choose hole locations
It is sold as
- Short straps for brickwork and general fixing
- Rolls for wall bracing and tie down runs
What about hoop iron regulations in Australia?
In Australia, hoop iron bracing must meet the performance requirements of the National Construction Code and be installed to the relevant Australian Standards, plus any engineer, designer, or manufacturer requirements for your specific project.
In practice, hoop iron bracing needs to be
- Correctly designed and selected for the project, including wind classification, building height,
-
- March 24, 2026
Reinforcing mesh overlap, often called a lap, is one of the most important details in slab and footing reinforcement. The overlap is what allows the load to transfer from one sheet of mesh to the next, so the reinforcement behaves as one continuous mat rather than separate pieces sitting next to each other.
Here is a practical guide to mesh overlap for common reinforcing types used in Australia.
What does overlap mean?
An overlap is the section where two pieces of mesh cover the same area, so they can be tied together and act continuously once the concrete is poured.
Overlaps must be:
Long enough to transfer forces between sheets, and
Tied properly so the mesh doesn’t separate while concrete is being placed and worked.
Square slab mesh
For square slab mesh, a common rule used on-site is: Overlap by one full square of mesh.
That means you lap one sheet over the next until one complete grid square is covered. This gives a consistent lap without guesswork.
Keep
-
- March 23, 2026
Yes, vinyl cladding can be painted in some scenarios, but it is often not recommended. If you do not follow the right procedures, product selection, and colour limitations is can cause issues.
If your using premium cladding, such as Mitten, with a specific colour or profile, many manufacturers strictly mention no painting required as it can create cracking or peeling when paint and vinyl expand at different rates. Some manufacturers also warn it can void warranties.
Quick answer
You can paint if:
- cladding is in good condition, properly cleaned and prepared
- you use paint suitable for plastics or vinyl
- your colour choices don’t create heat related warping
Don’t paint if:
- it is brittle, cracked, warped, or has failed sections
- you are trying to solve moisture issues
- warranty terms exclude painting
Pros of painting vinyl cladding
- Cheaper than replacement if the cladding is structurally sound but looks faded.
- It brings a fast visual change
- Can extend the “presentable” life If the cladding